Contents
Introduction
In this post we will explain how to create a new user in Raspberry Pi by replacing the default one. The basic configuration of groups and permissions will also be discussed.
Create a new user in Raspberry
It is a good and secure practice to change the default user pi and to create a new one, specially if you are going to enable SSH connections. First of all, let’s create a new user in Raspberry by typing:
sudo adduser dummyUser

Añadiend el usuario `dummyUser' ...
Añadieno el nuevo grupo ` dummyUser' (1001) ...
Añadindo el nuevo usuario ` dummyUser' (1001) con grupo ` dummyUser'...
Creando el directorio personal `/home/dummyUser'...
Copiando los ficheros desde `/etc/skel' ...
Introduzca la nueva contraseña de UNIX:
Vuelva a escribir la nueva contraseña de UNIX:
passwd: contraseña actualizada correctamente
Cambiando la información de usuario para dummyUser
Introduzca el nuevo valor, o pulse INTRO para usar el valor predeterminado
Nombre completo []: Dummy User
Número de habitación []:
Teléfono del trabajo []:
Teléfono de casa []:
Otro []:
¿Es correcta la información? [S/n] S
Then your user, in my case named dummyUser, is created. Before using it you need to set its password by typing:
sudo passwd dummyUser
Make sure that you have correctly configured your keyboard, specially if your password includes special signs, such as brackets or underscores.
Editing the groups
In a next step you should include this user in all the groups where the pi user was. There are different ways to do this operation. From my point of view, the easiest way is just to edit the file /etc/group with vi or your preferred text editor. Then you can replace (if you are going to delete the default pi user) or add (using a comma) the new user in all the groups containing the pi user.
sudo /etc/group

root:x:0:
daemon:x:1:
bin:x:2:
sys:x:3:
adm:x:4:dummyUser
tty:x:5:
disk:x:6:
lp:x:7:
mail:x:8:
news:x:9:
uucp:x:10:
man:x:12:
proxy:x:13:
kmem:x:15:
dialout:x:20:dummyUser
fax:x:21:
voice:x:22:dummyUser
cdrom:x:24:dummyUser
floppy:x:25:
tape:x:26:
sudo:x:27:dummyUser
audio:x:29:dummyUser
dip:x:30:
www-data:x:33:
backup:x:34:
operator:x:37:
list:x:38:
irc:x:39:
src:x:40:
gnats:x:41:
shadow:x:42:
utmp:x:43:
video:x:44:dummyUser
sasl:x:45:
plugdev:x:46:dummyUser
staff:x:50:
games:x:60:dummyUser
users:x:100:dummyUser
nogroup:x:65534:
input:x:101:dummyUser
systemd-journal:x:102:
systemd-timesync:x:103:
systemd-network:x:104:
systemd-resolve:x:105:
systemd-bus-proxy:x:106:
crontab:x:107:
netdev:x:108:dummyUser
pi:x:1000:
messagebus:x:109:
avahi:x:110:
ntp:x:111:
ssh:x:112:
bluetooth:x:113:
spi:x:999:
i2c:x:998:dummyUser
gpio:x:997:dummyUser
dummyUser:1001:
ssl-cert:x:114:
bind:x:115:
~
"/etc/group" 59 lines, 816 characters
Option two consists of using the command groups when logged in with user pi to write down the groups containing pi and then add them, subsequently, to the new user.
groups
pi adm dialout cdrom sudo audio video plugdev games users netdev input
sudo useradd -m -G adm,dialout,cdrom,sudo,audio,video,plugdev,games,users,netdev,input dummyUser
The sudoers group

As you may have already noticed, some commands need to start with sudo because they need privileges to run. You should never log in into your Raspberry Pi as root user rather to use the sudo command (SUperuser DO) to grant a command access as the superuser, since this is a much better (and securer) alternative. This will allow you, first of all, to restrict user privileges and also to log the activities taken by users when sudoing.
Let’s take a closer look to the sudo configuration file. In your Raspberry you can find it in /etc/sudoers.
sudo vi /etc/sudoers
You will see a zone where the user privileges are specified. One option to include your user as a sudoer is just adding it in this section in a new line following the structure user host=(user:group) cmds:
dummyUser ALL=(ALL:ALL) ALL
Here dummyUser is the name of your new user and:
- The first ALL denotes that this rule applies to all user root logged in from all hosts.
- The second ALL allows user root to run commands as all users.
- The third ALL allows user root to run commands as all groups.
- The fourth and last ALL allows root to run all commands.
In the sudo file you will find also a zone where the groups are configured. Usually there will be a line like the following:
# Allow members of group sudo to execute any command
%sudo ALL=(ALL:ALL) NOPASSWD:ALL
Note that if you want to force sudo to ask for a password, you should change the text NOPASSWD:ALL to PASSWD:ALL.
In this case, the easiest way to grant sudo access to your new user is just adding him to the sudo group with the following line:
sudo useradd -m -G sudo dummyUser
Loging in automatically with a new user in Raspberry
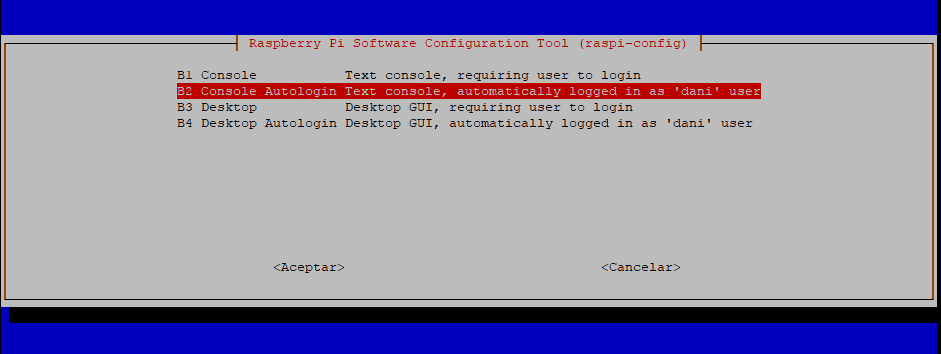
As we decribed in a previous post, raspi-config utility can be used to automatically login in console or boot mode. However, it will only work with the default pi user. Therefore, if you have some experience with bash, you can edit the script to adapt it to your user name (find the Github code here).
But it is much easier to directly edit the getty target file. To do it, first of all open the following file and then change the user pi by your own user:
sudo vi /etc/systemd/system/getty.target.wants/getty@tty1.service
ExecStart=-/sbin/agetty --autologin pi --noclear %I $TERM
Doing some cleaning
Once logged in with your new user in Raspberry, remember to delete the pi user, and also its home folder, by tipping:
sudo deluser -remove-home pi
You should also delete the pi and spi groups by typing:
sudo groupdel spi
sudo groupdel pi
4 thoughts on “Creating a new user in Raspberry Pi”