Contents
Introduction
Backing up is an absolute crucial task that should be performed daily, especially if you update constantly data or make frequent changes to your Raspberry Pi. Backups should be also performed before making any big change to your system, such as installing an upgrade or starting a new project.
In this post a couple of ways of creating a Raspberry Pi backup will be shown . The first backup method will create an exact copy of the Raspberry’s SD card. This will be a reliable copy, however it will require to shutdown the server for some minutes. The second method is a short bash script that will perform a copy of the most important files to an external USB device while the system is up and running.
Backing up your Raspberry Pi SD Card
Before starting, install in your PC Win32 Disk Imager or other alternative tool able to read an write raw image files to SD cards. Once installed, turn down your Raspberry Pi in a secure way to avoid future problems with the file system. From the command line enter the following to do a clean shutdown:
sudo shutdown -h now
When your Raspberry is turned off, extract the micro SD card and insert it in your PC using a USB or built-in card reader. The SD Card has two partitions, as it can be noticed. One of them is called Boot and has FAT format. The second partition has EXT4 format and cannot be opened in Windows.
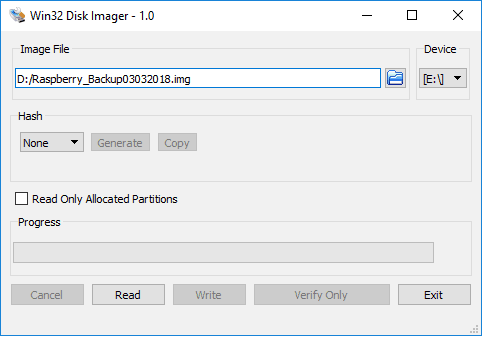
After that, run Win32 Disk Imager in your PC. In the opened window, you should select in the device section the drive assigned to the SD card. It does not really matter if you choose the FAT or the EXT4 partition. This program will make a low level read, copying all the contents of the SD card.
Now click on the folder icon and choose the location and filename of the backup that you are going to perform. I would recommend you to include in the filename the current date, as well as use .img extension. Finally click the Read button.
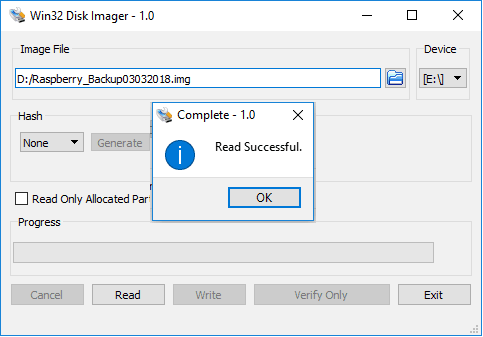
During the next minutes Win32 Disk Imager will perform an exact copy of your SD card. The operation duration will depend on the size of the card, however you can obtain an estimation of the ending time in the right bottom corner of the application. Once finished, you will get a message similar to the following.
Extract securely the SD card from your PC and insert it back in your Raspberry Pi. You are ready to boot your Linux distribution again.
Restoring your Raspberry Pi backup SD Card
If something goes wrong and you need to restore a previously backed up image, just perform as follows. Insert in your PC the SD card where you want to restore the image. Open Win32 Disk Imager and select in the device section the letter assigned to this media. Choose then the file containing the image to be restored. Once you are done, just click the Write button. This process will take a while, depending on the size and speed of your SD card. Once the restore is complete, just remove the SD card safely from you PC and insert it back in your Raspberry Pi.
How frequently should I backup my SD Card?
There is no easy answer to this question. As it has been covered in this post, the number of writes that a certain block of an SD card can perform is limited. Without previous notice, you SD card can become corrupt and prevent your Raspberry Pi from booting up.
With the method I explain here, you will perform an exact and secure copy of your Raspberry Pi. However, this procedure will usually take more than 10 minutes to be executed. Moreover it will require to shutdown and access manually your Raspberry SD card slot. These two facts can be a big inconvenient depending on the physical installation and/or usage.
For this reason I decided to set this full backup procedure to a monthly frequency. However, to avoid loosing data frequently updated, I use a backup script to securely safe the most important files of my installation in a daily basis. In the next section the main parts of this script will be exposed.
Raspberry Pi Backup Script
The script developed places a copy of the files to be backed up in a temporal folder. When the copy is complete, the folder is compressed and copied in a safe location. No need to say that this location should not be in the SD Card. Moreover, the script automatically removes the backups older than X days to avoid consuming all the free space.
Preparing the backup
In the first section of the script the name and location of the backup and temporal folder is decided. If this folder already exists, all its contents are removed. Otherwise, the folder is created. The name of the backup file will follow the structure backup_ + current date + .tgz. I use the logger utility to write messages easily identifiable into the system log.
TMP_LOCATION="/media/Multimedia/CopiaDeSeguridad/pi/backup/"
BACKUPS_LOCATION="/media/Multimedia/CopiaDeSeguridad/pi/"
BACKUP_NAME=`date +%Y%m%d_%H%M%S`
BACKUP_FULL_NAME="${BACKUPS_LOCATION}pi_backup_${BACKUP_NAME}.tgz"
TAG="backupPi"

logger "$0 Starting Raspberry Pi Backup with name $BACKUP_FULL_NAME"

if [ ! -e $TMP_LOCATION ]; then
	logger -t $tag "Creating Directory $TMP_LOCATION"
	mkdir -p $TMP_LOCATION
else
    logger -t $TAG "Deleting old backup in $TMP_LOCATION"
    rm -rf $TMP_LOCATION/*
fi
Copying files
After that, for each file to be backed up, its layout is recreated inside the temporal folder and a copy is made.
WEEWX_CONFIGURATION="/etc/weewx/"
WEEWX_USER_CODE="/usr/share/weewx/user/*.py"

mkdir -p "${TMP_LOCATION}${WEEWX_CONFIGURATION}"
cp -r $WEEWX_CONFIGURATION "${TMP_LOCATION}/etc/"

mkdir -p "${TMP_LOCATION}/usr/share/weewx/user/"
cp -r $WEEWX_USER_CODE "${TMP_LOCATION}/usr/share/weewx/user/"
Copying databases
I use weewx to register and show weather information captured by my meteorological station, as well as from my heating system. The information is stored in a database using SQLite. The following code performs the backup of this databases:
WEEWX_DATABASE_FOLDER="/media/Multimedia/weewx/"
WEEWX_DATABASES="weewx cmon calduino"

mkdir -p "${TMP_LOCATION}${WEEWX_DATABASE_FOLDER}"

for db in $WEEWX_DATABASES; do
    sqlite3 "${WEEWX_DATABASE_FOLDER}${db}.sdb" .dump > "${TMP_LOCATION}/${WEEWX_DATABASE_FOLDER}/${db}.sdb.bkp"
done
Compressing and saving
Finally, the backup file is compressed and placed in its location. Additionally, the backups older than X days are deleted.
BACKUP_HISTORY=7

tar -C $TMP_LOCATION/.. -zcf $BACKUP_FULL_NAME backup

find $BACKUPS_LOCATION -mtime +$BACKUP_HISTORY -name "pi_backup_*.tgz" -exec rm -f {} \;

logger -t $TAG Backup ended and copied to External Hard Disk. Deleted Backup Olderer than $BACKUP_HISTORY days."
2 thoughts on “Doing a Raspberry Pi backup”